Add/Edit Catch
Adding and editing a catch uses the same screen, so once you've added a catch, you can always come back and add to or edit the information you've recorded.
To add data simply fill out the fields required and click 'Save Catch' at the bottom of the page.The minimum required data for a catch is the species. Attempting to save the catch without completing this field will result in a validation error shown in red at the bottom of the page and the catch will not allow the save until it has been completed.
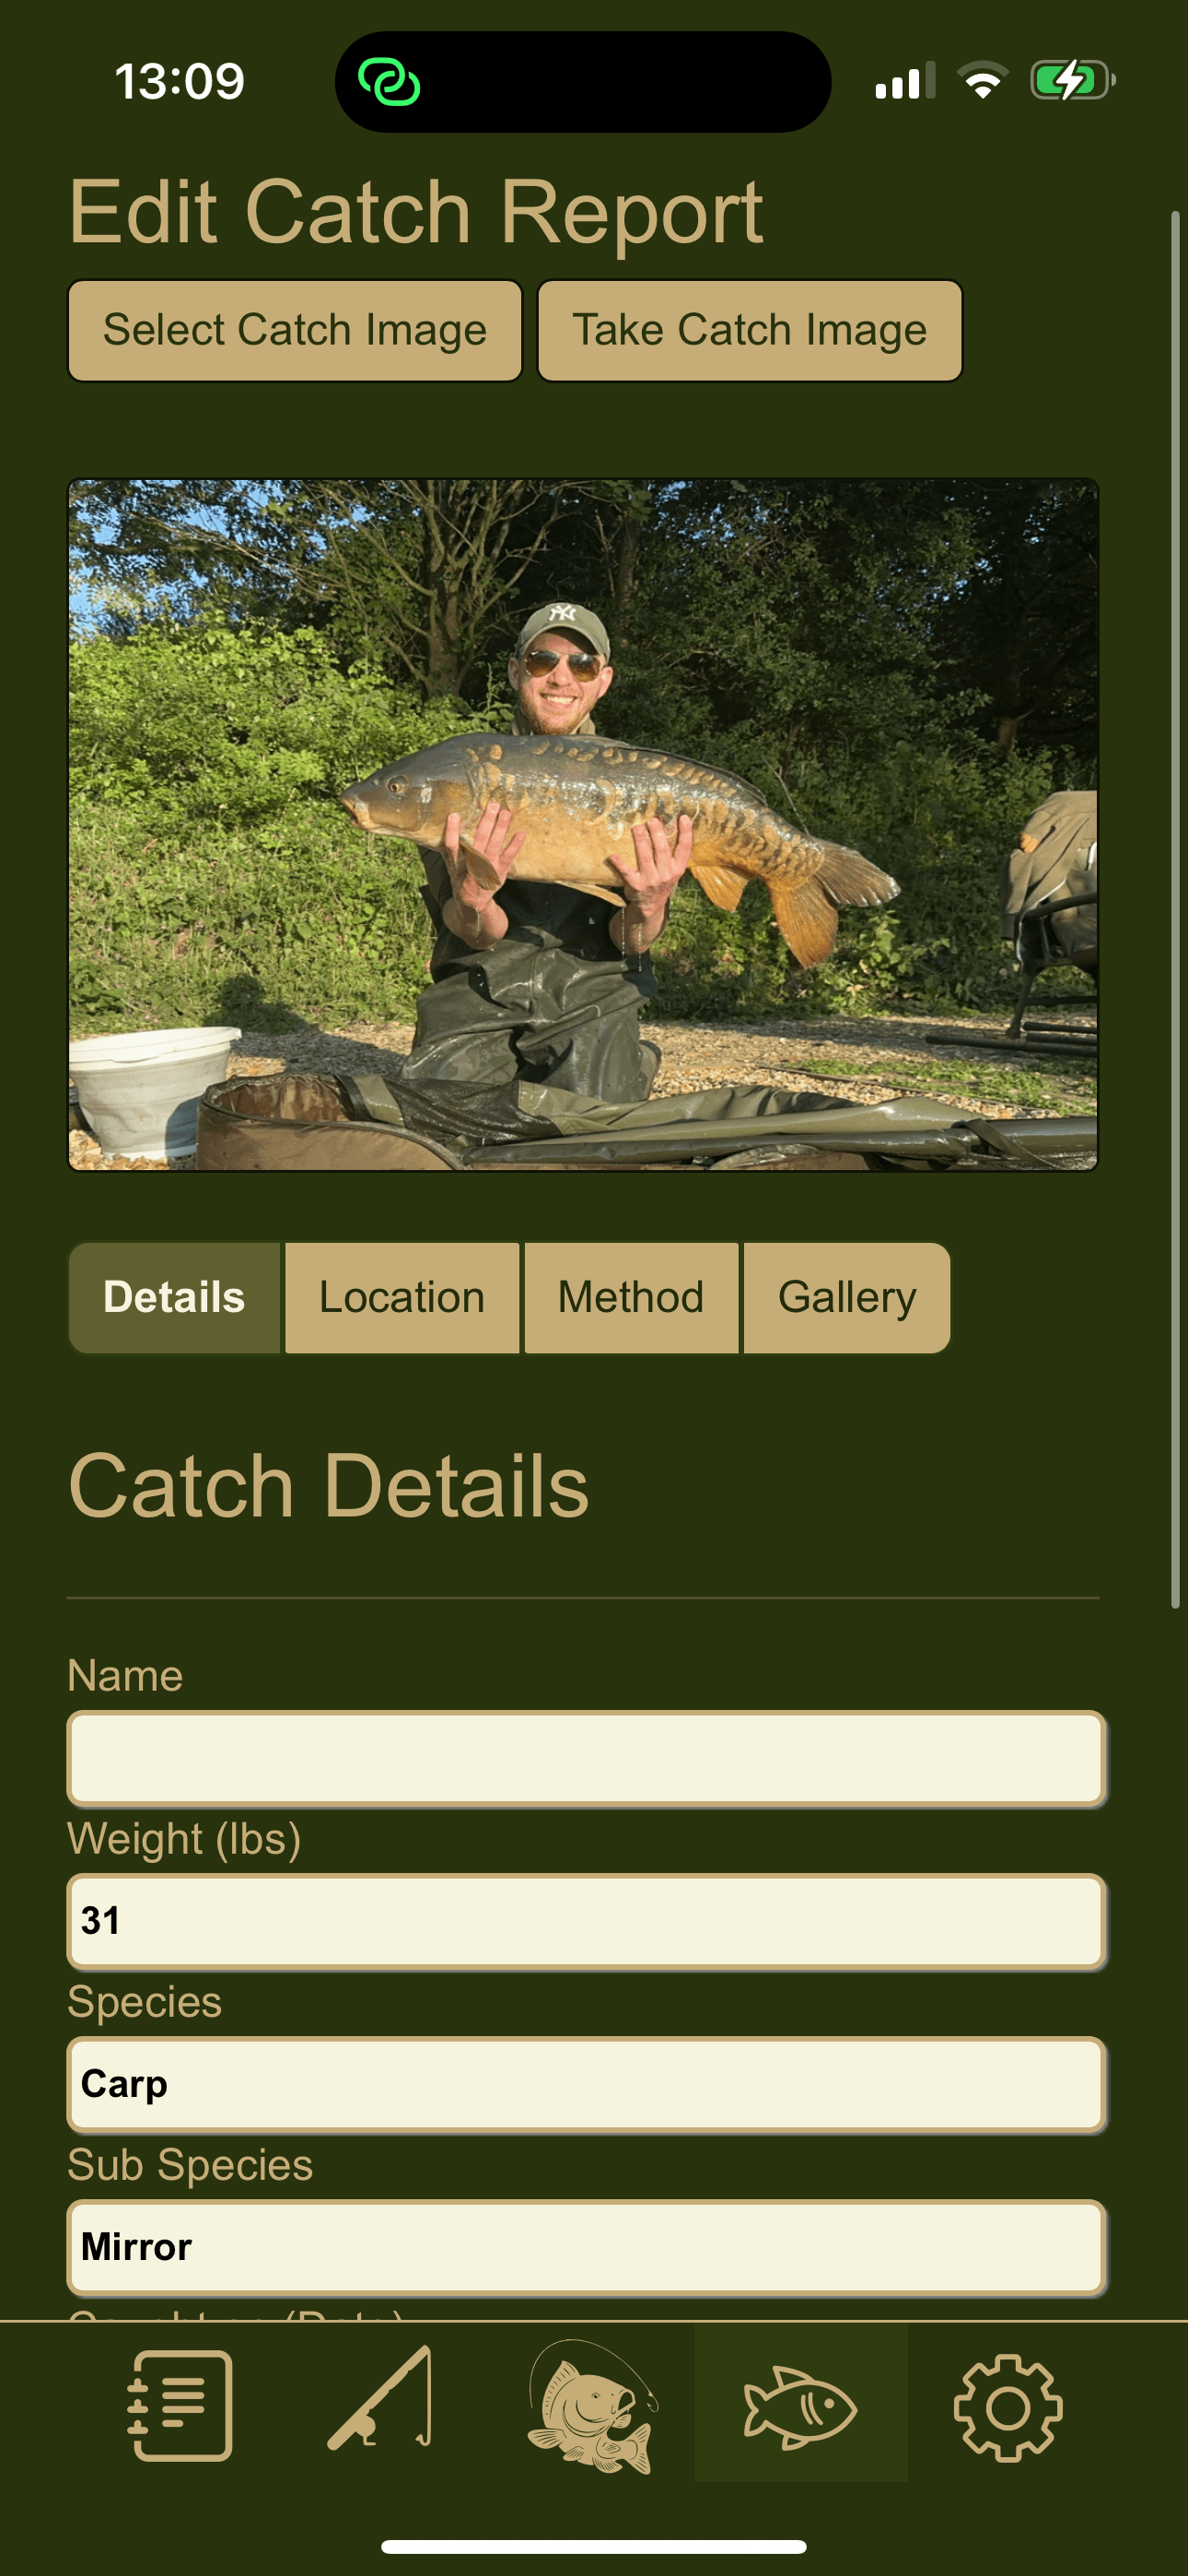
Select Catch Image
To add a main image for the catch which will be displayed on the lists and the catch page, select the 'Select Catch Image' button and select an image from a valid source.
Alternatively, you can use the 'Take Catch Image' button to use your devices camera to take a picture and use that instead.
Rotate Image
Once an image has been selected, a 'Rotate Image' button will appear below. Clicking this will rotate the image by 90 degrees each click. This is so you can adjust the orientation of the selected image. Click on the heading text to show the help popup.
Main page tabs:
To add data simply fill out the fields required and click 'Save Catch' at the bottom of the page.The minimum required data for a catch is the species. Attempting to save the catch without completing this field will result in a validation error shown in red at the bottom of the page and the catch will not allow the save until it has been completed.
Select Catch Image
To add a main image for the catch which will be displayed on the lists and the catch page, select the 'Select Catch Image' button and select an image from a valid source.
- For Apple Devices: this function only supports existing images saved to your camera roll, if you wish to use an image from a different source, load the image on your phone, take a screenshot and then you will be able to select the image from your camera roll.
- For Android Devices: you can select an image from your camera roll, or a third party cloud service such as dropbox, google images, google drive etc.
Alternatively, you can use the 'Take Catch Image' button to use your devices camera to take a picture and use that instead.
Rotate Image
Once an image has been selected, a 'Rotate Image' button will appear below. Clicking this will rotate the image by 90 degrees each click. This is so you can adjust the orientation of the selected image. Click on the heading text to show the help popup.
Main page tabs:
-
Details (holds general information about the fishery):
- Name: creates a name for this catch, this is intended for named fish. If completed, this will be the catch label when viewing your catch lists.
- Weight: creates the weight of the catch, this is defaulted to lbs but can be changed to kg in Settings > App Settings > Catch Weight Units.
- Species: creates the catch species i.e. Carp [Mandatory field]
- Sub Species: creates the catch sub-species i.e. common / mirror. If completed and name is left blank, this will be the catch label when viewing your catch lists.
- Caught On Date: creates the date of the catch.
- Notes: creates any additional notes you would like to record about the catch.
- Session Label: if adding the catch from a session, this will display the label of the session the catch will be added to.
- Add to Catch Album? if adding the catch from a session, this checkbox will control whether the catch is added to your catch album (Checked), or just added to the session and not displayed in your catch album (Unchecked).
-
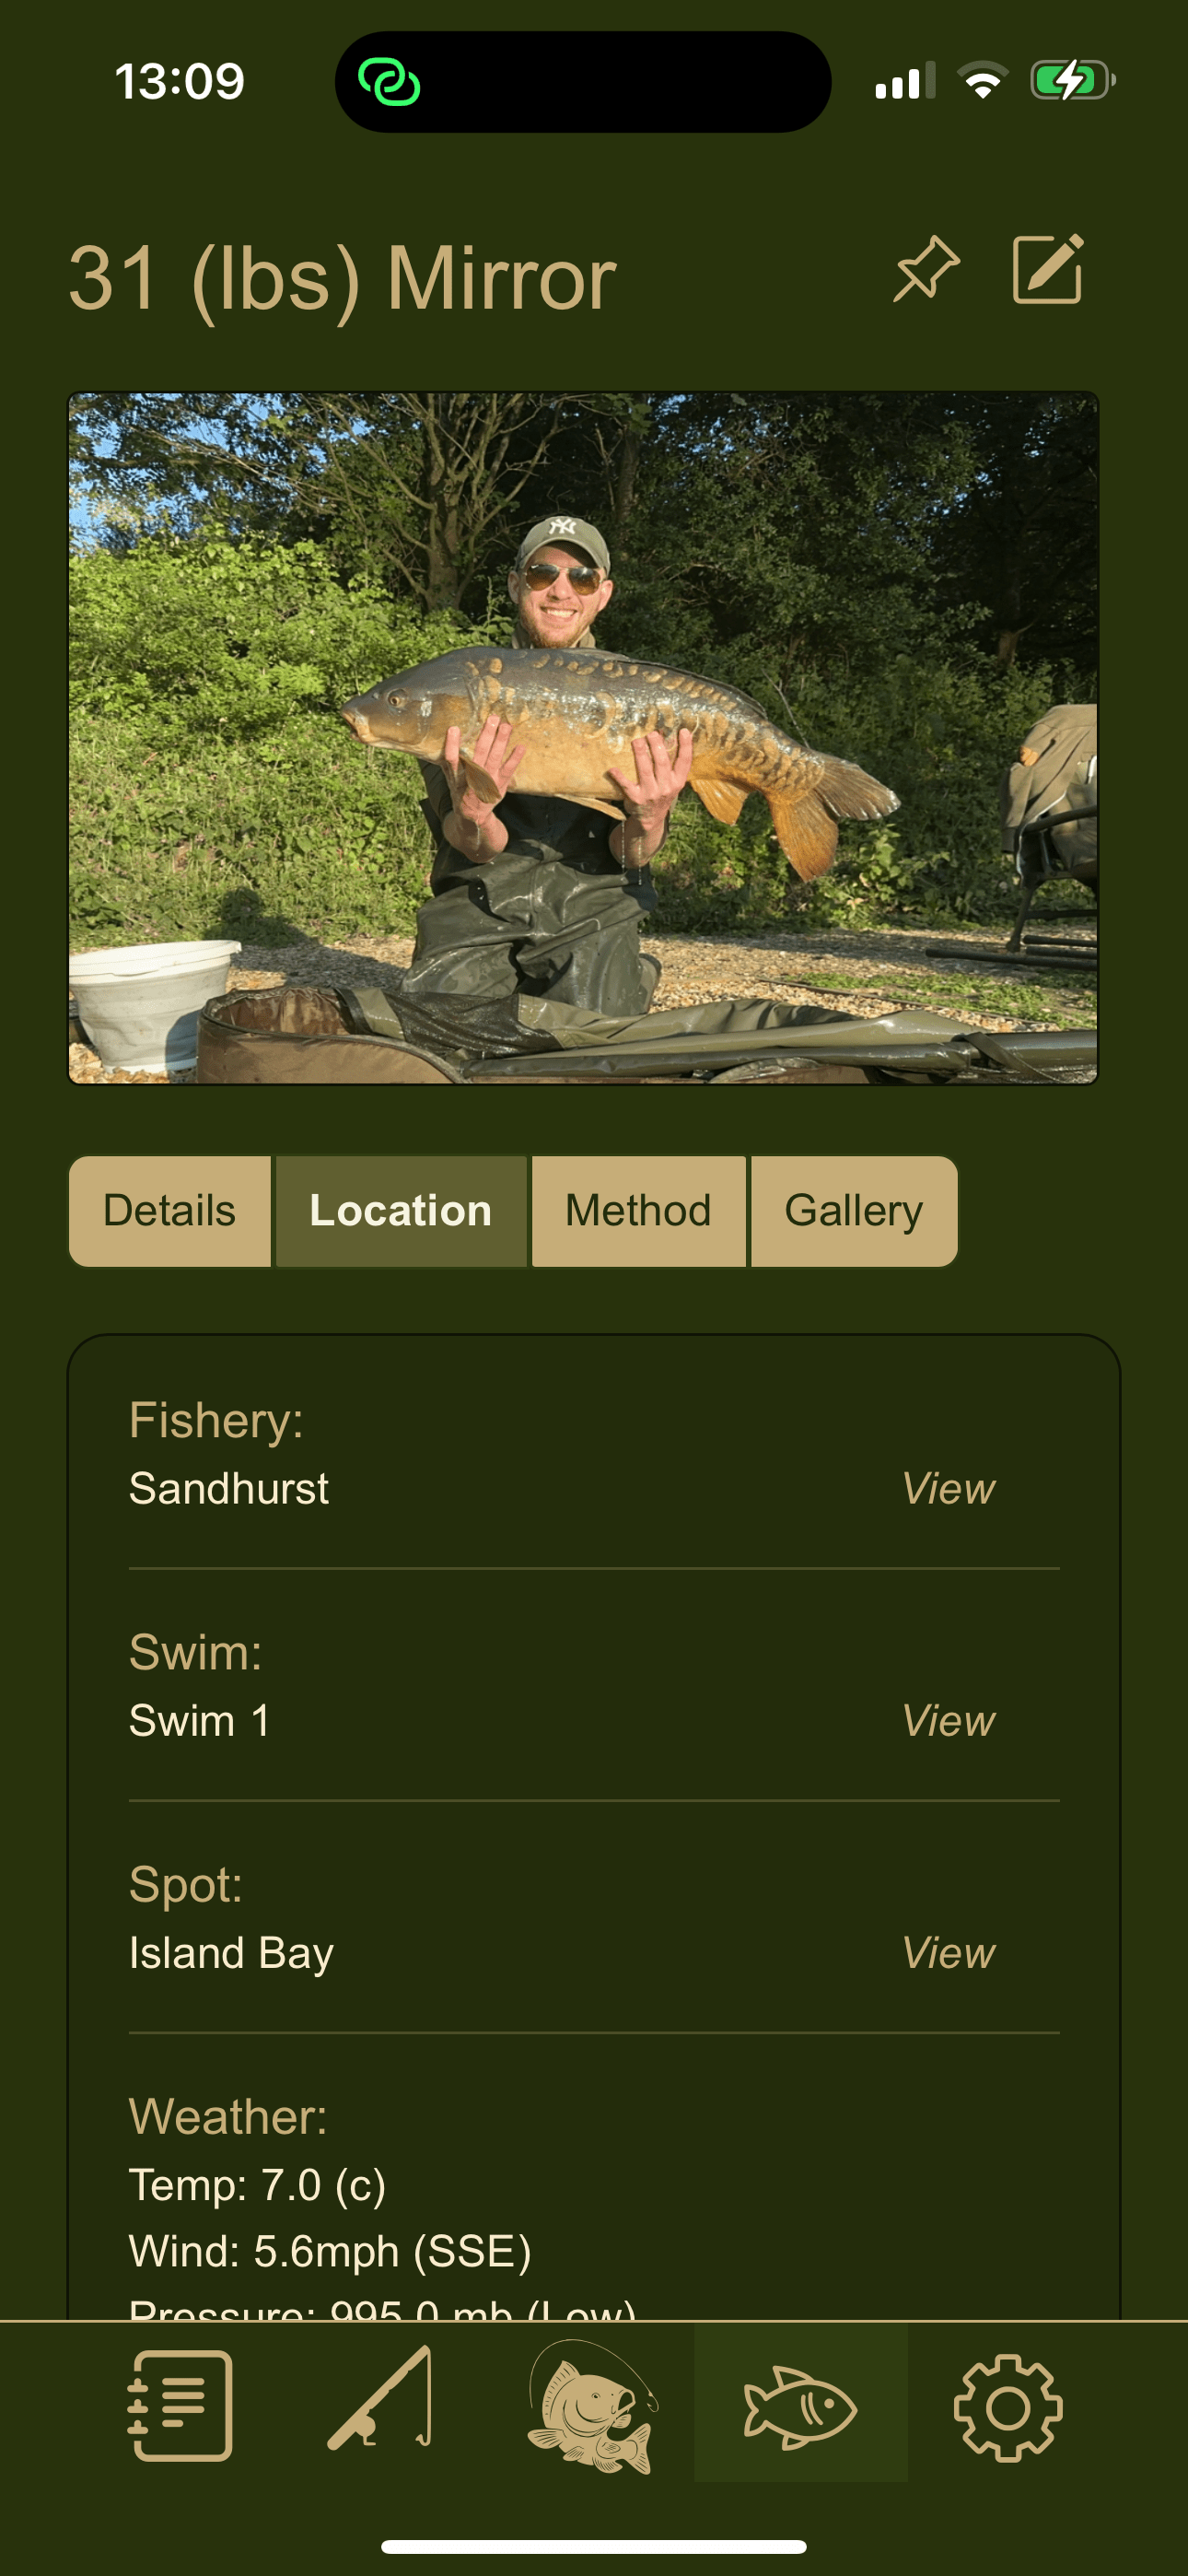
Location (holds location details for where the fish was caught):
- Fishery: select from a list of your fisheries. Once selected, this will populate 'Swims' with a list of swims associated with the selected fishery.
- Swim: select from a list of swims for the selected fishery. Once selected, this will populate 'Spots' with a list of spots associated with the selected swim.
- Spot: select from a list of spots for the selected swim.
- Weather: logs the weather report at the time of capture. This is automatically populated by using the selected fishery's location (city + region) to download the current weather data.
- Moonphase: logs the moon phase at the time of capture. This is automatically populated with the current moonphase.
-
Method (holds the method used to catch the fish):
- Rig: logs the end tackle rig used to catch the fish.
- Hookbait: logs the hook bait used to catch the fish.
- Ground Bait: logs the ground bait or 'free offerings' used to draw the fish in for capture.
- Hook Pattern: logs the hook type used to catch the fish.
-
Gallery (holds additional gallery images for the catch allowing you to save all of your best photos for the catch).
To add additional images select the 'Add additional image' button and select an image. These images follow the same source restrictions as mentioned for the main catch image.
- Save Catch will save any changes you have made to any of the catch's tabs.
- Delete Catch will delete the catch and all of its images. This cannot be undone!
- Back will take you to the last valid page you visited.


